Granting Cube Discover and Access Rights
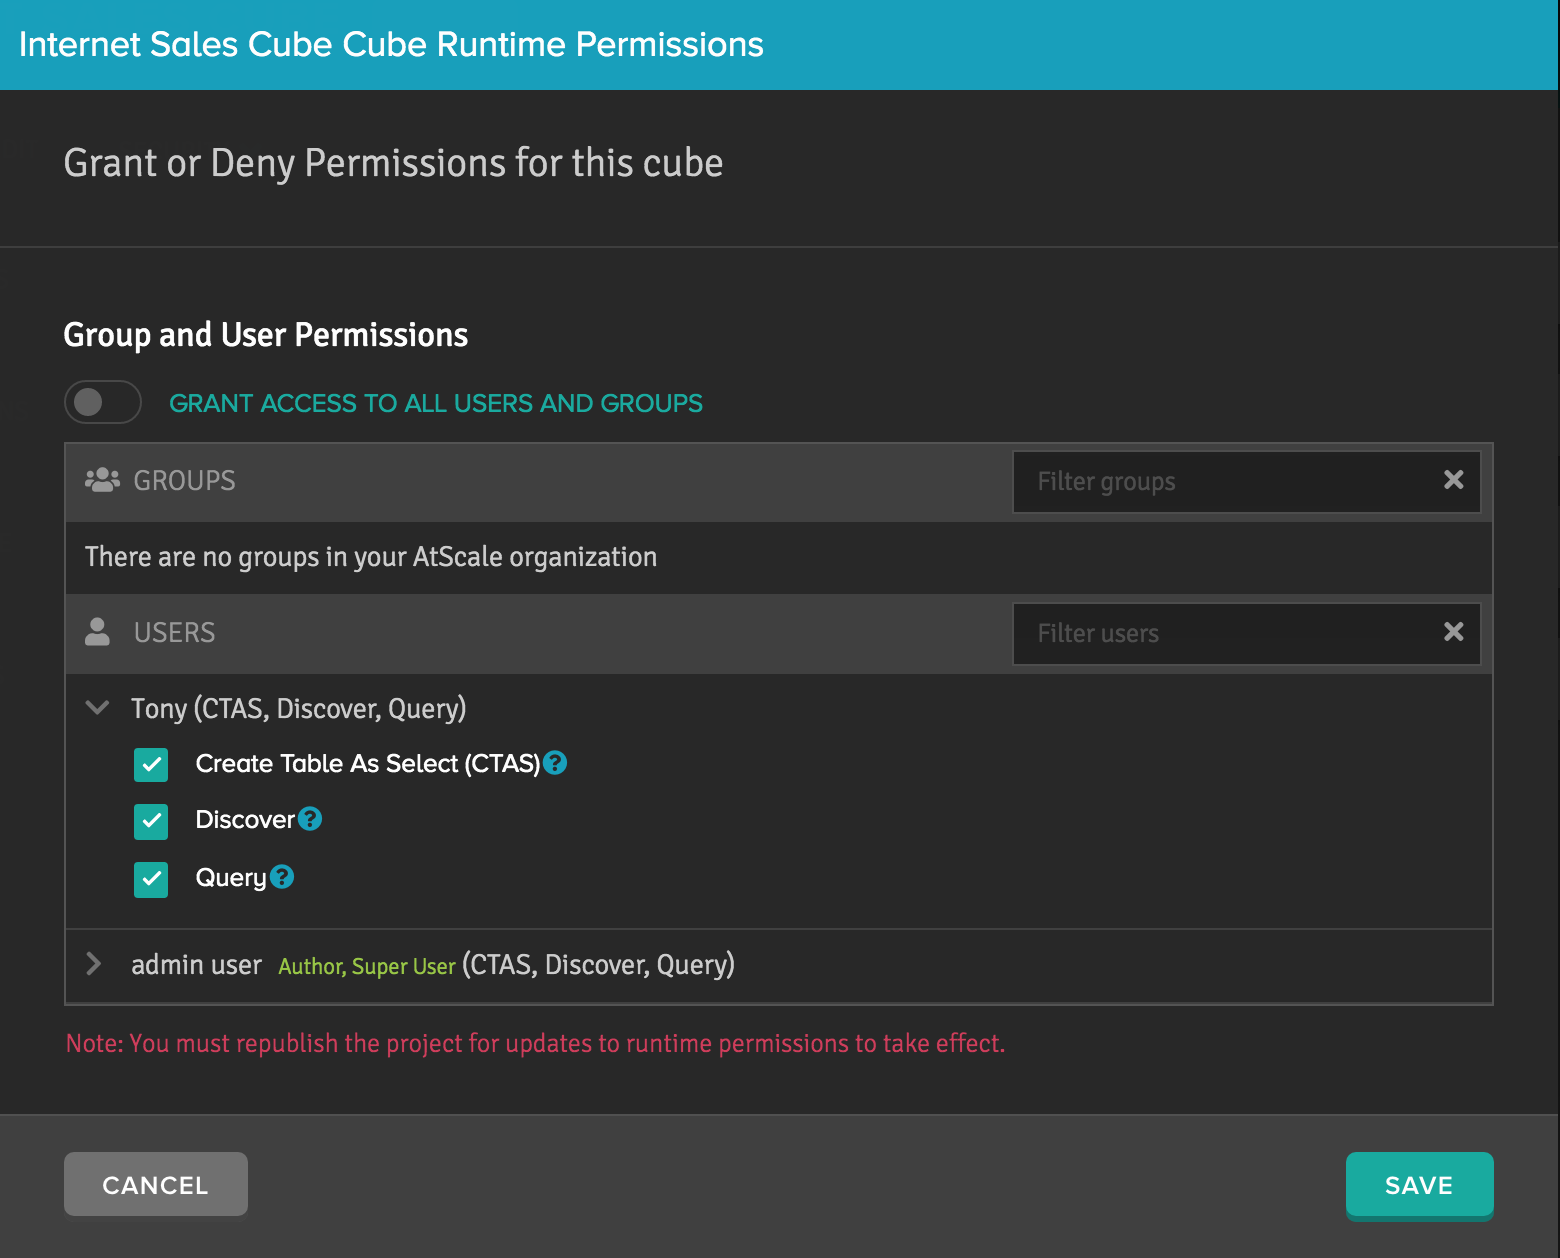
To manage a data consumer's query and access rights to cubes and perspectives within the Data Catalog, you must navigate to the cube level runtime permissions dialog for the cubes associated with the project. This dialog appears upon accepting a request notification from a data consumer, or by navigating to the cube level runtime permissions dialog manually. Here, the data owner (cube author) can govern the following permissions:
- Create Table As Select (CTAS): Whether a user can create tables from existing tables via SQL queries.
- Discover: Whether a cube will appear to the data consumer on the Data Catalog page.
- Query: Whether the data consumer can query against the requested cube. If this permission is disabled for a data consumer (and Discover is enabled), the Request tab appears adjacent to that cube on the Data Catalog page for the data consumer.
Figure 1. The Cube Level Runtime Permissions dialog.
For any permission changes to be put into effect for the data consumer, the project must be re-published.
Procedure: Granting Cube Discover and Access Rights via Cube Level Runtime Security
- From the AtScale Design Center homepage, select the Projects tab on the top menu.
- Select the project you wish to grant (or restrict) access to, then select the cube associated with the project from the Draft section.
- Select Security > Runtime Permissions. The cube level runtime permissions dialog appears.
- Turn off the Grant Access to All Users toggle to expose the users in your organization.
- Grant or deny Discover and Query access rights by expanding the drop-down adjacent to the user's name, and select or clear the check box for each permission as you see fit.
- Re-publish the project. See Publish a Project.
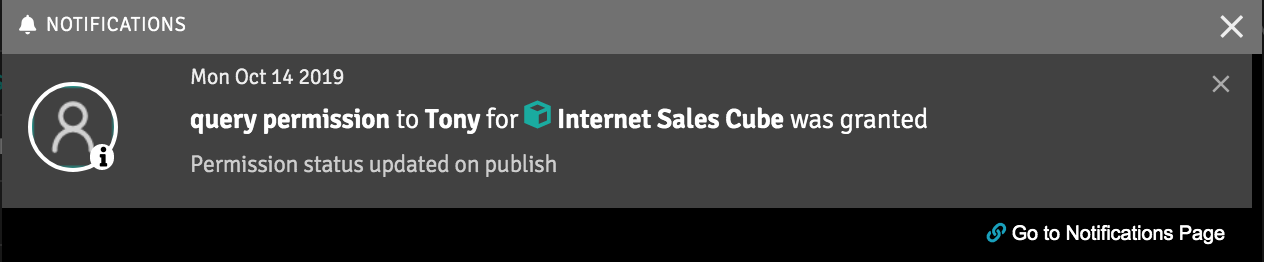
Figure 2. The success notification after granting query access as a data owner.
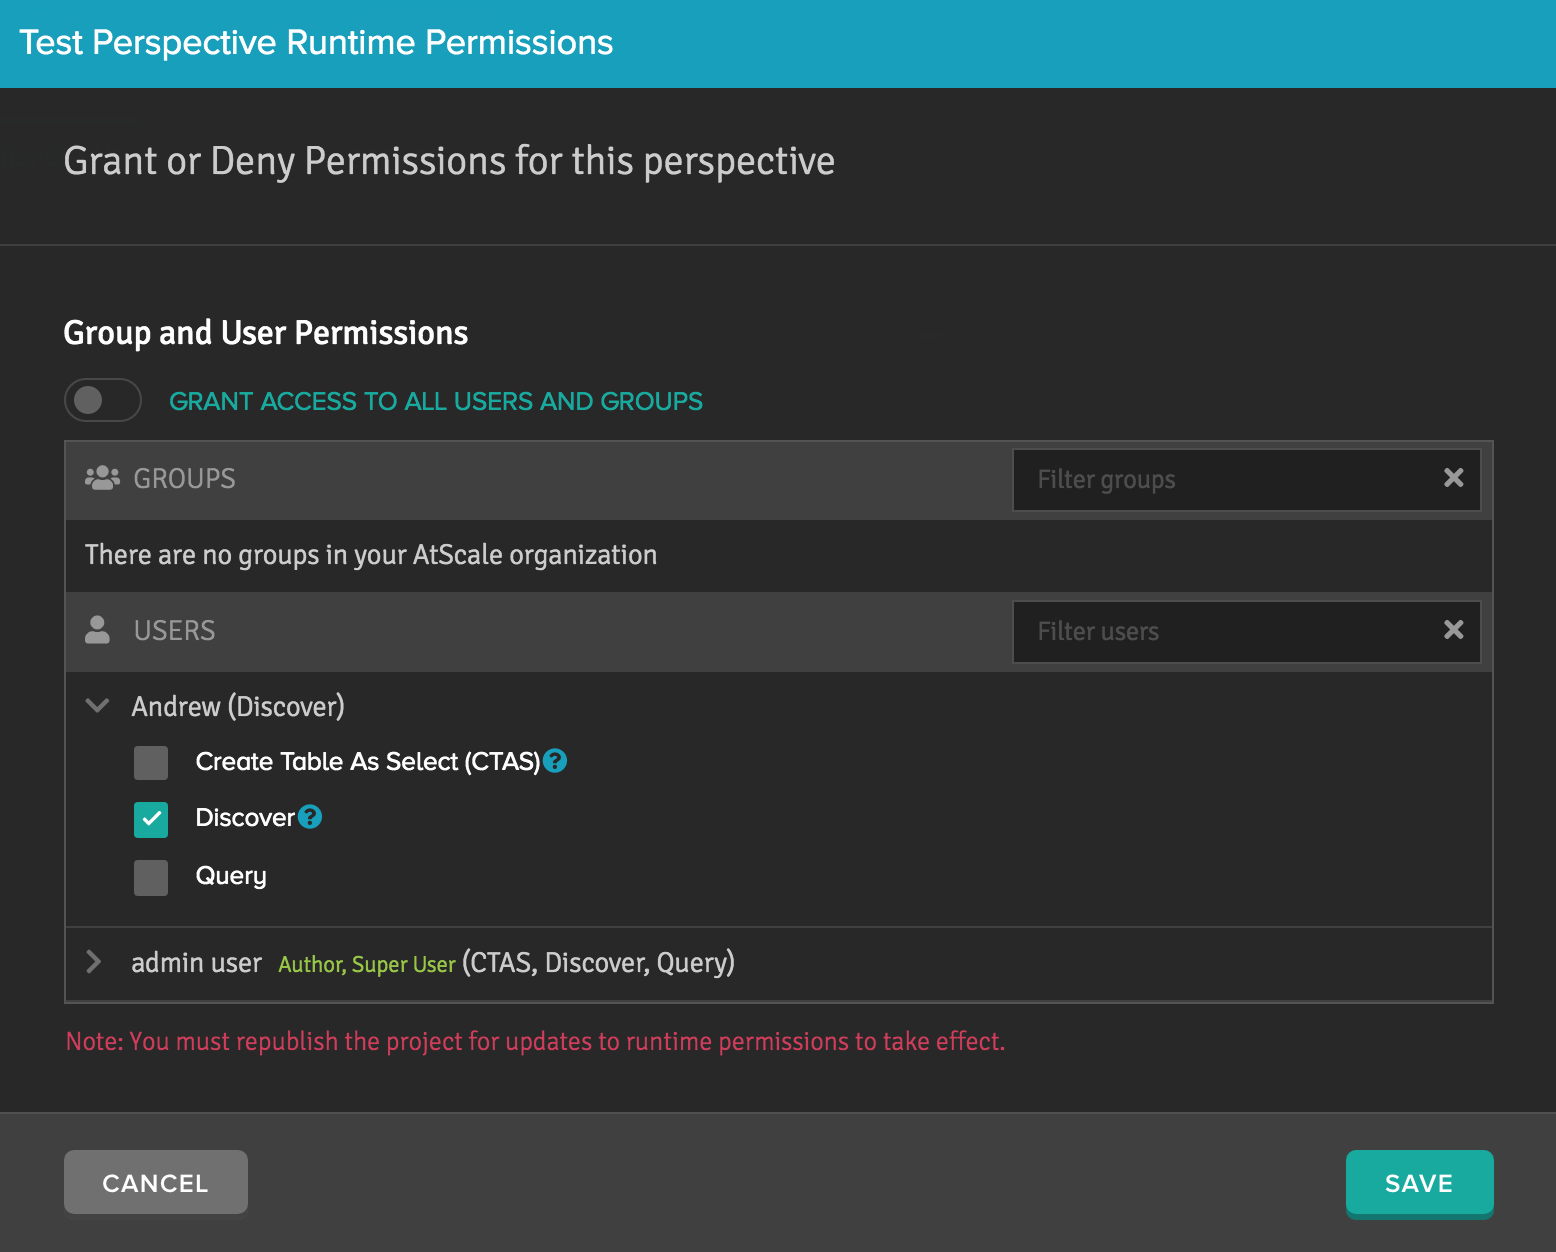
Procedure: Granting Cube Discover and Access Rights on a Perspective
- From within your AtScale cube, add and define a perspective.
- Select the cube from within the Draft section that was used to create the perspective.
- Select Perspectives beneath the cube name, then the ellipsis adjacent to the perspective name to reveal the Security button.
- Turn off the Grant Access to All Users toggle to expose the users in your organization.
- Grant or deny Discover and Query access rights by expanding the drop-down adjacent to the user's name, and select or clear the check box for each permission as you see fit.
- Re-publish the project. See Publish a Project.
Figure 3. The runtime permissions dialog for a perspective.
Procedure: Granting Cube Discover and Access Rights via the Notifications Page
When a data consumer selects Request from the Data Catalog page on a query-restricted cube, you as a data owner receive a notification. Notifications are indicated at the top of the Design Center by a red number attached to the notifications bell icon (depending on the number of requests made) adjacent to your user profile menu.
- Click the notifications bell to see the Notifications dialog, which displays recent requests for query permissions on the cube made by data consumers. (Select Go to notifications page from the notifications pop-up to manage other requests from the Notifications landing page.)
- Click Review or Deny to respond to a request. If you select to review a request, the cube level runtime security dialog (displayed in Figure 1) appears.
- In the dialog, select the check box for Query permission under the data consumer's name to grant that user query access to the cube.
- Re-publish the project. See Publish a Project.
If a data owner does not respond to a request in a week, the request will revert from Pending to Request for the data consumer from within the Access column.
Figure 4. The Notifications bell icon with one notification (zoomed in to highlight location in top right of Design Center).

Figure 5. A query permissions request notification from a data consumer.
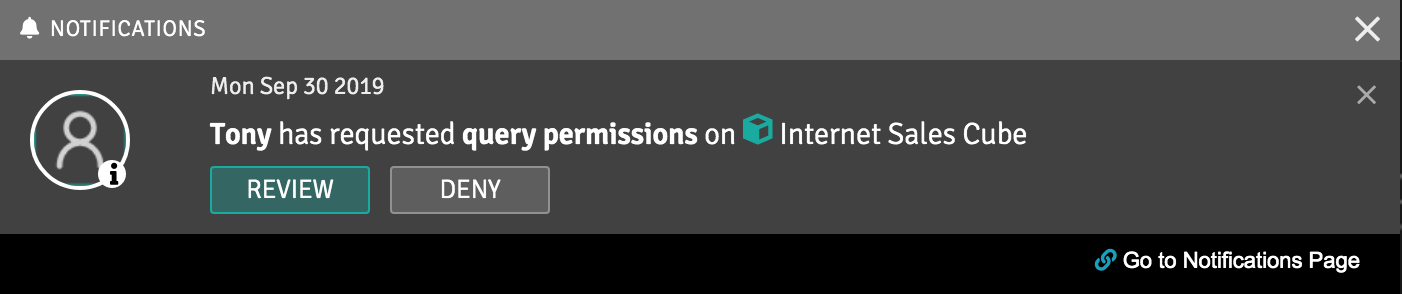
Figure 6. The Notifications landing page.

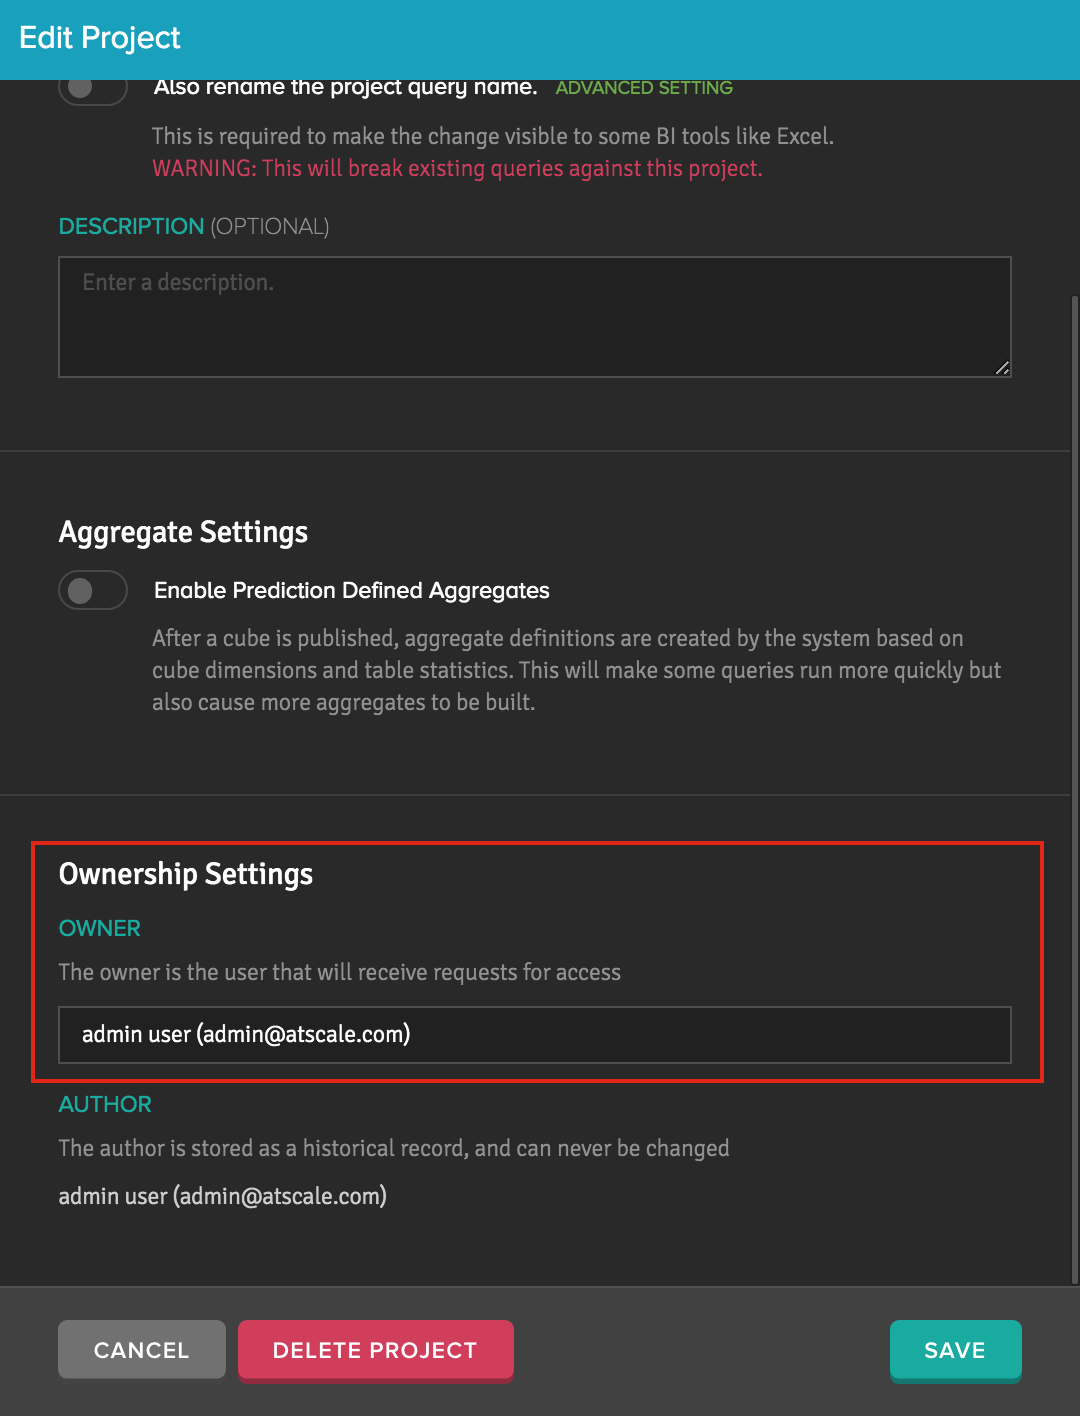
Procedure: Changing Owner of a Project
A project owner is the user that will receive requests for access. As a result, the ability to toggle a project's ownership is available through the Edit dialog at the project level of a cube. To change a project's ownership:
- Select Projects from atop the Design Center, and locate your project.
- From the Draft section of the project, select the Edit tab.
- Scroll down to the Ownership Settings section and delete the current owner's name from the dialog.
- Select the drop-down to reveal available users to transfer ownership of the project to. Select Save. This user will now receive requests for access.
Figure 7. The Ownership Settings section within the Edit Project tab.
Permissions Required to Use the Data Catalog
At a minimum, the permissions required to access the Data Catalog are Login and Read Published Projects. To simplify this process, we suggest assigning these permissions to the Runtime Query User embedded role from within your default organization. See creating and editing roles.
- Login: A permission found within the Security > Create Role dialog. If creating a new role, A user must have the Login permission enabled in order to gain access to the Design Center.
- Read Published Projects: A permission found within the Security > Create Role dialog. If creating a new role, A user must have the Read Published Projects permission (and Login permission) enabled in order to see the CATALOG selection from within the Design Center.
- Discover: A cube level runtime permission managed by the data owner. Dictates whether or not the cube will show up on the Data Catalog page for the data consumer (See Figure 1).
- Query: A cube level runtime permission managed by the data owner. Dictates whether or not the data consumer can query against the requested cube. If this permission is restricted, a Request button will appear in the Access column for the data consumer (See Figure 1).